In this blog post, we'll guide you through the process of integrating your website with DHL shipping and customizing its services through the admin area. From installation to customization, learn how to optimize your shipping operations with DHL.
|
Installation:
- Access the admin area of your website.
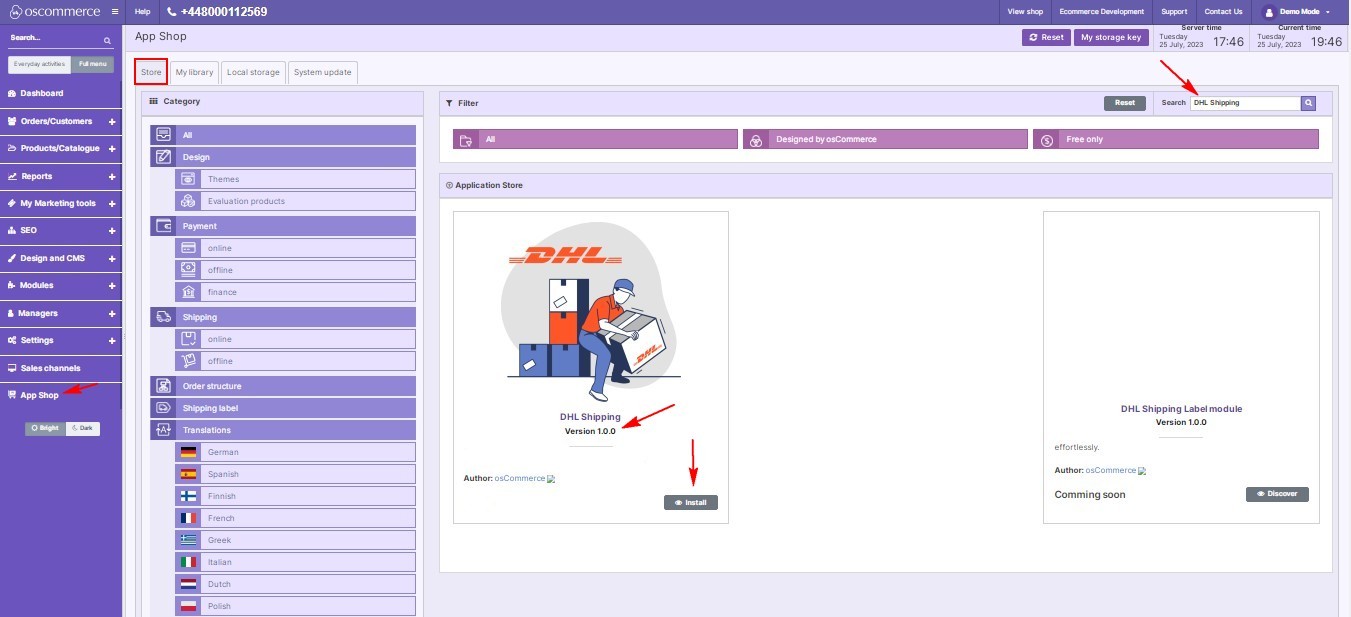
- Navigate to the "App Shop" and then the "Store" tabs.
- Perform a quick search to find the "DHL Shipping module version 1.0.0."
- Install the module on your website and follow any on-screen prompts or instructions to complete the installation process.
|
 |
|
|
Customization:
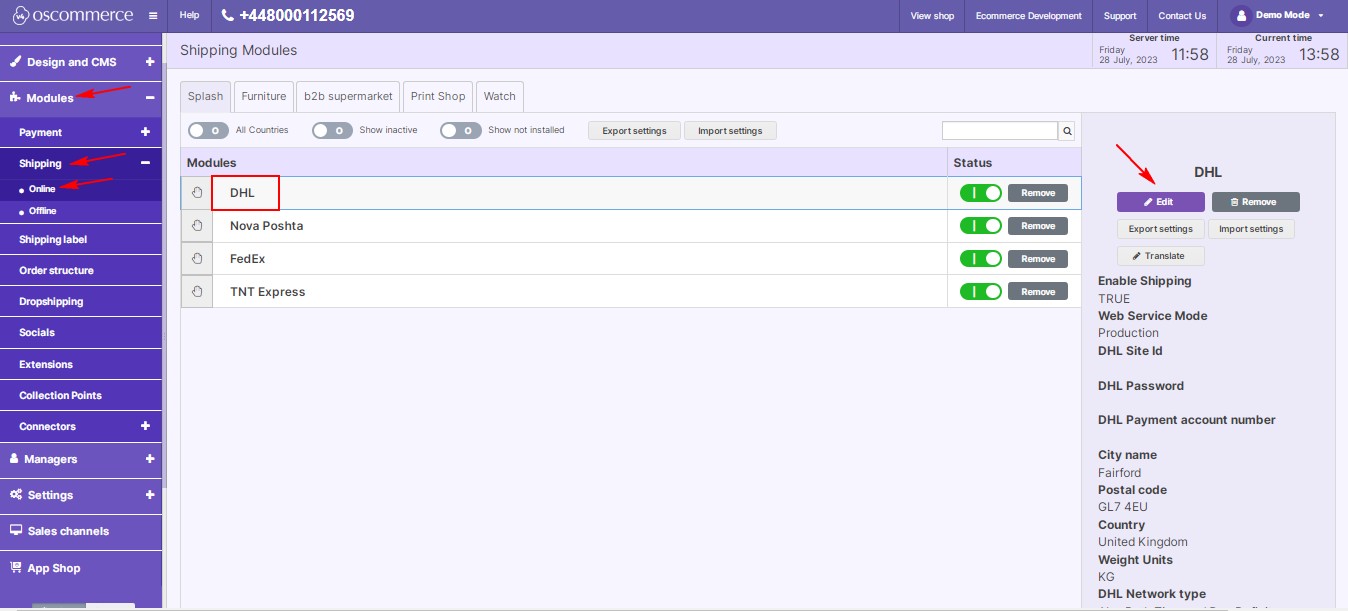
- After successful installation, go to the "Modules," "Shipping," and "Online" tabs in the admin area.
- Locate the DHL Shipping module and click on the “Edit” button to access the settings.
|
|
Settings Section:
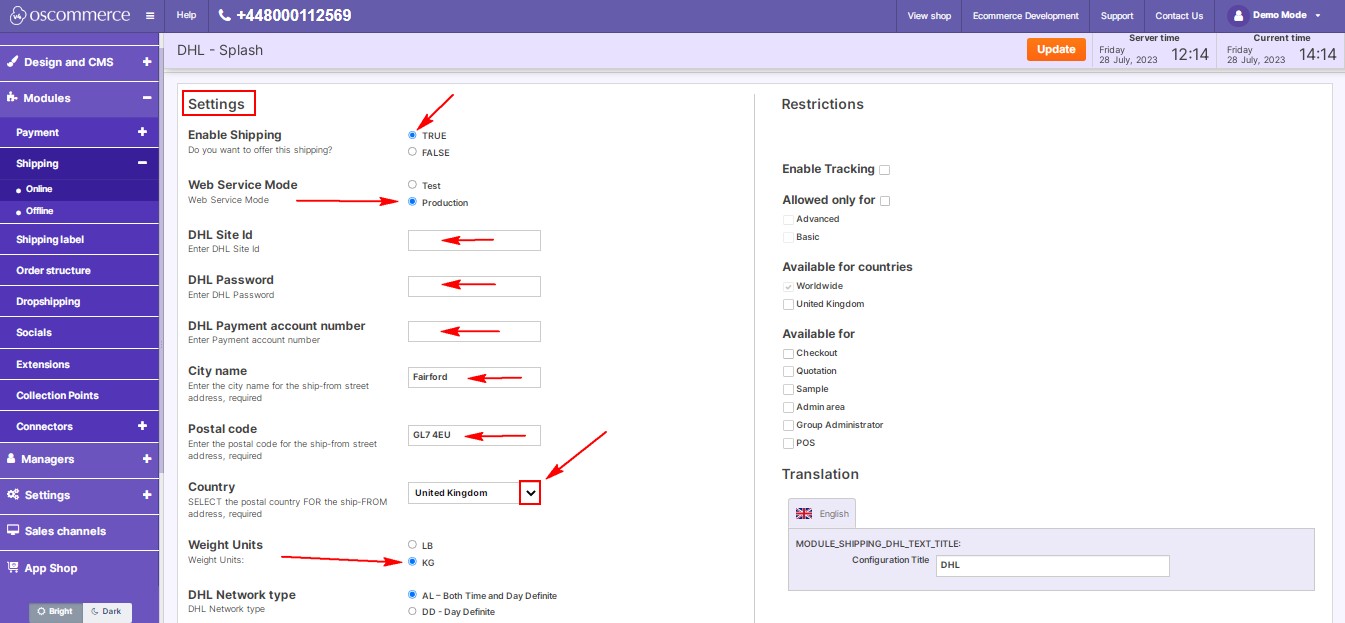
- Enable DHL shipping for your website and choose between test and production web service modes.
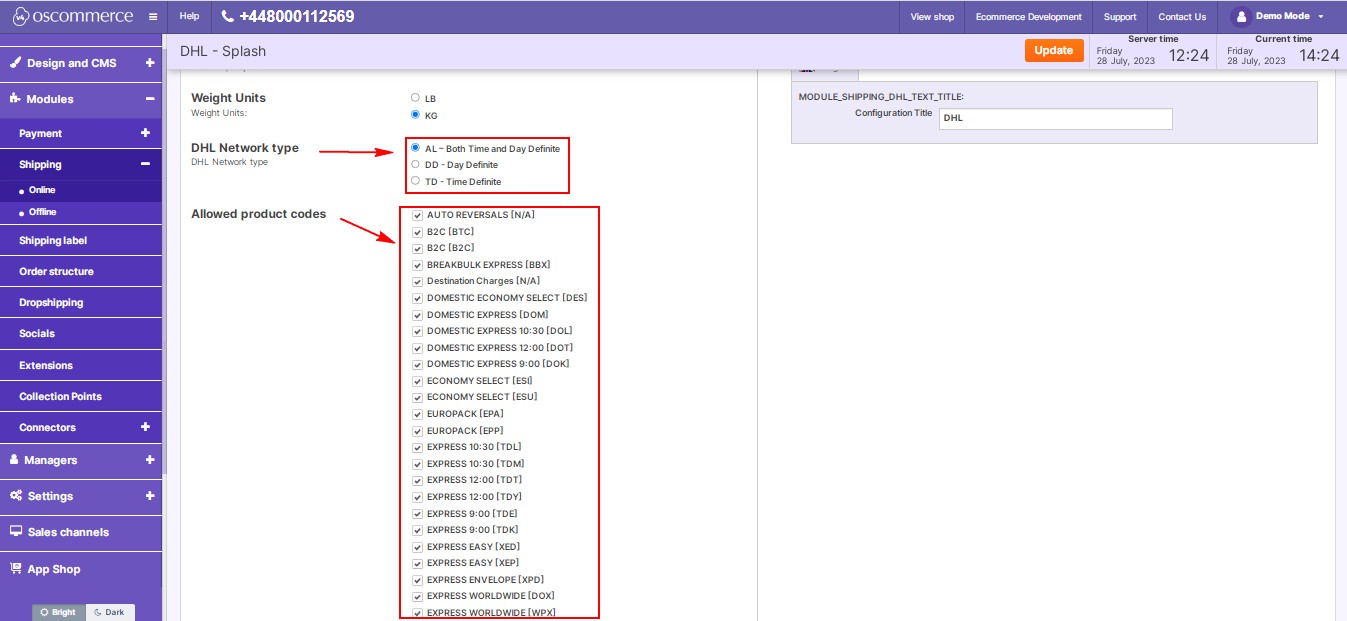
- Enter essential DHL information, including site ID, password, payment account number, sender details, weight measurements, network type, product codes, handling fees, insurance amount, and tax classes.
- Select delivery date rules and ownership settings to provide better control over shipments.
- Manage the display order of shipping options during checkout. Lower values will prioritize DHL Shipping.
|

|
|
|
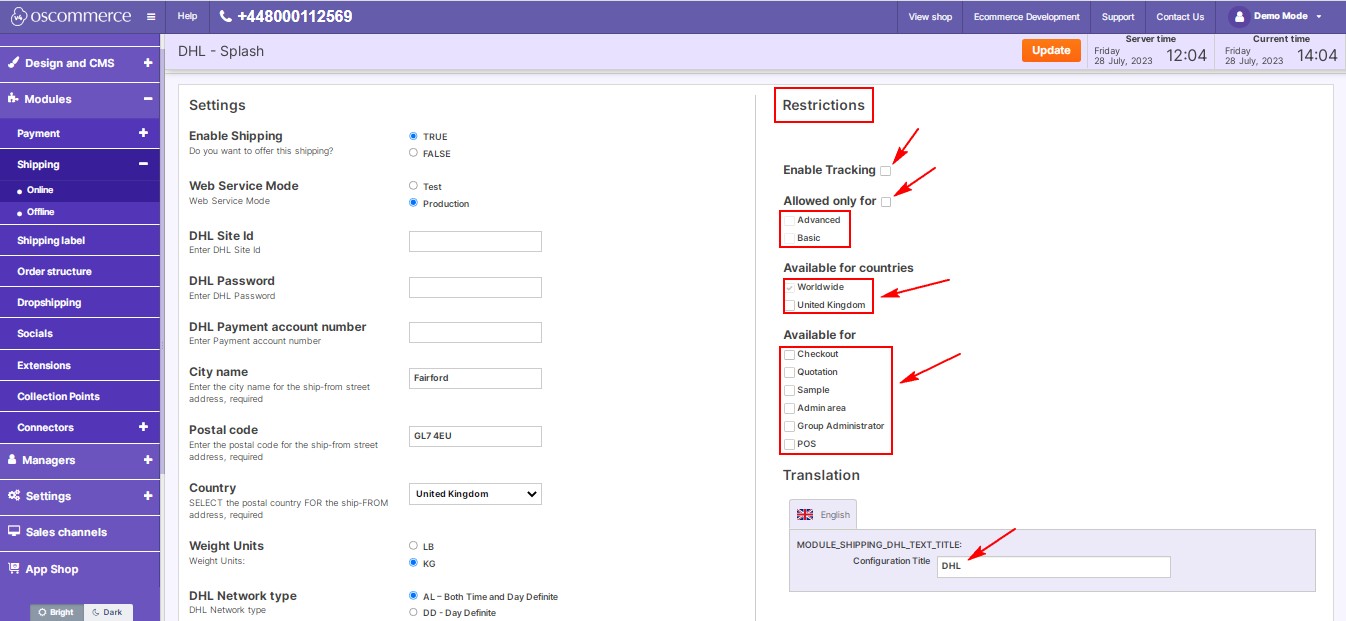
Restrictions Section:
- Choose customer groups, countries, or website pages to restrict DHL shipping access.
- Specify the shipping module name for both backend and frontend based on language preferences.
- Enable package tracking for improved shipment monitoring.
|
By following our guide, you can seamlessly integrate DHL shipping services into your website and customize them to meet your specific requirements. Start managing your DHL Shipping today and optimize your shipping process for success.


