
A customer using the Print Shop theme wanted to adjust the size of banner images displayed on their website. Specifically, they needed to resize the two smaller banners below the main banner, which were originally 450x350 pixels, to a smaller size, such as 250x150 pixels.
Initially, they attempted to modify the images using the built-in editor. Although the system indicated that the changes were saved, an error message appeared, and the update was not applied. The customer then tried creating a new banner with images sized at 150x100 pixels. However, the system automatically enlarged them back to the original dimensions.
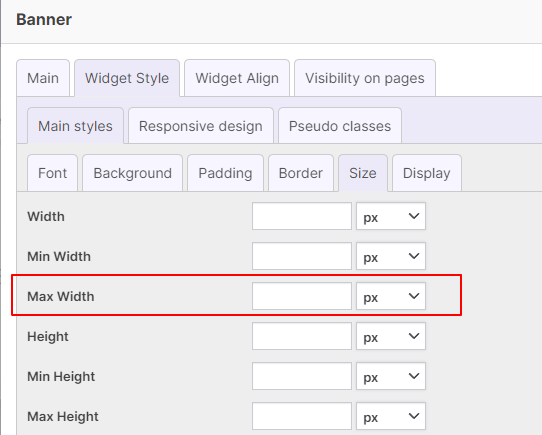
The osCommerce support team explained that in the Print Shop theme, banner sizes are controlled by CSS, ensuring that they fill the available space. To manage the size of these images, the customer could adjust the banner width settings in the admin panel.
Additionally, the banner group settings allow users to define specific image dimensions for different screen resolutions.
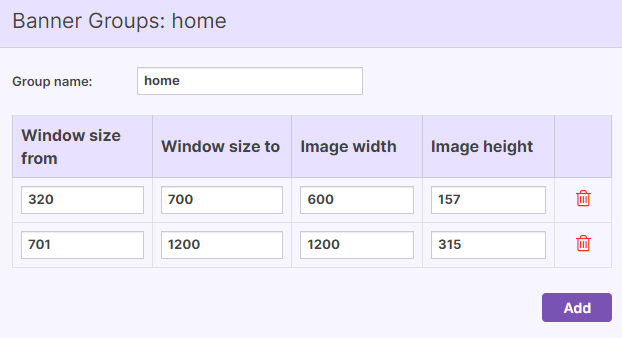
Once these settings were configured, the system provided options for uploading images that fit the defined dimensions. If any images were missing, the system generated them based on the main banner image. However, banners would still expand to occupy the available space as designed.
By following these steps, the customer successfully gained more control over banner image display while ensuring their website maintained a visually consistent layout.