Managing Cron Scheduler
Efficiently manage and automate website processes by setting up cron jobs with the "Cron Scheduler" module. This comprehensive guide will walk you through the installation, configuration, and management of cron jobs, helping you streamline operations and improve efficiency on your site.
|
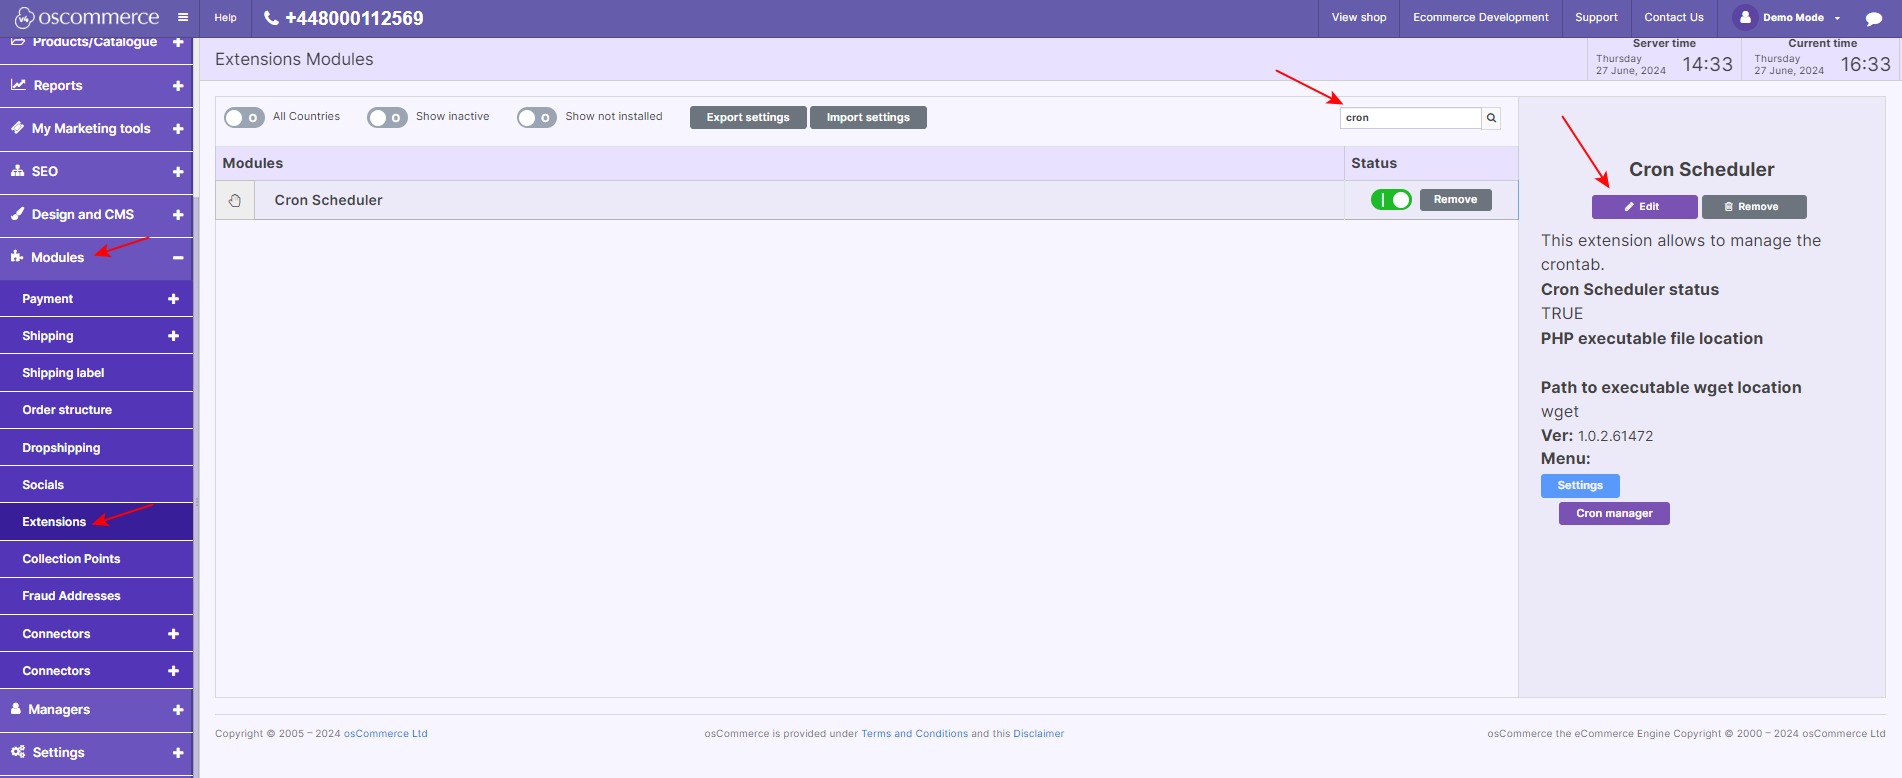
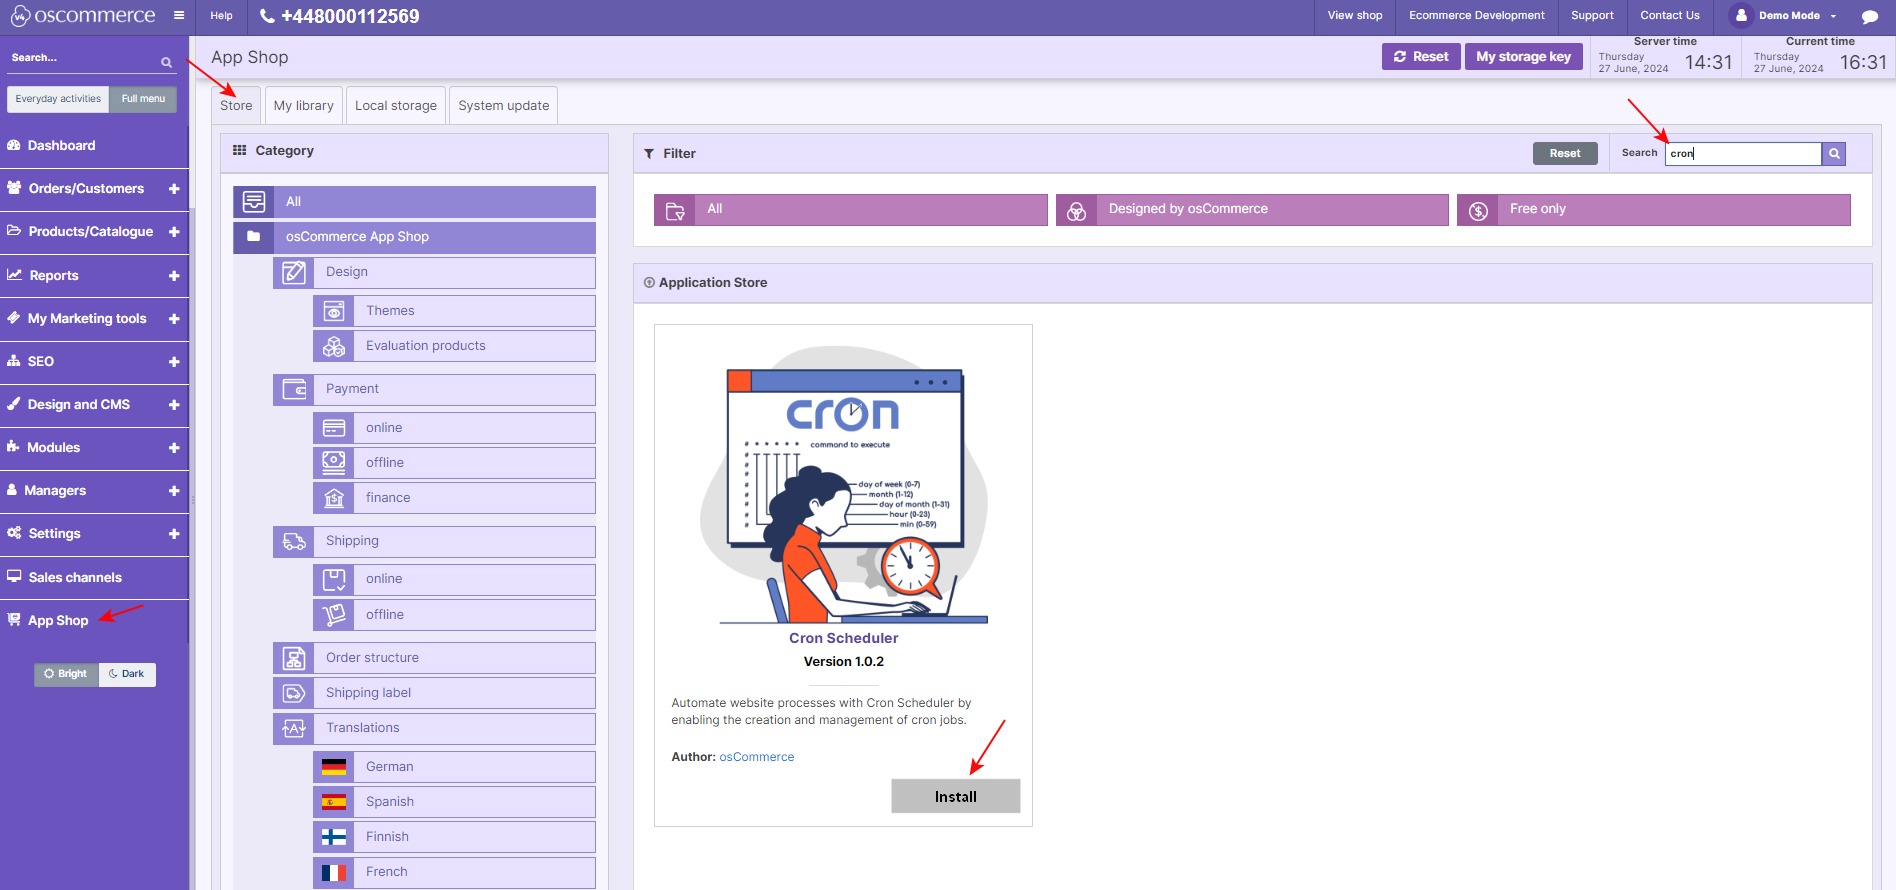
Step 1: Log In Start by logging into the admin area of your website. Step 2: Access App Shop and Store Tabs Navigate to the App Shop and Store tabs in your admin panel. Step 3: Find and Install the Module
|
 |
|
|
Step 4: Enable and Configure the Module
|
|
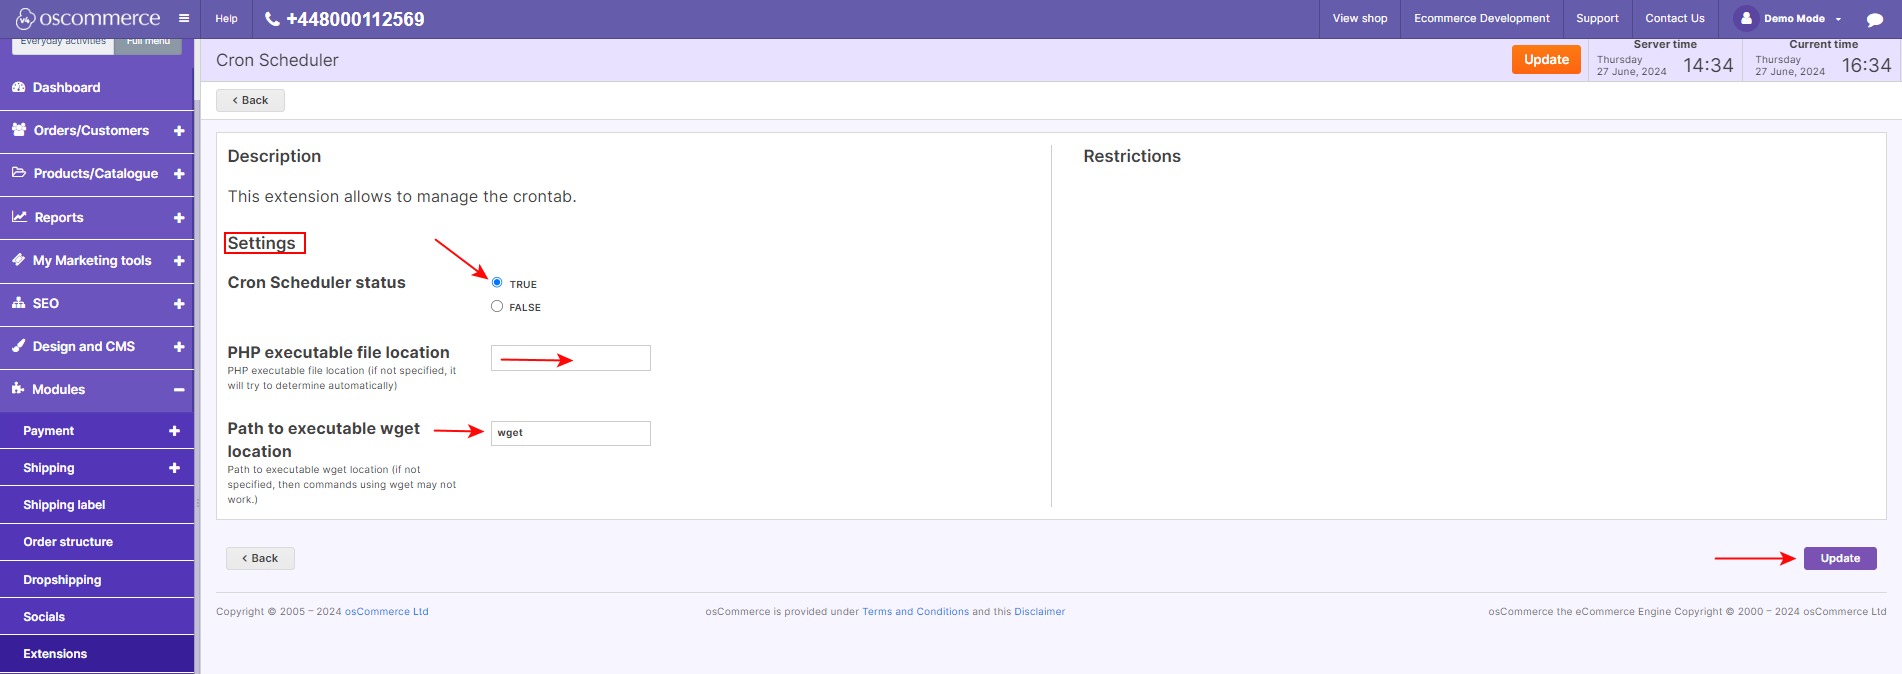
In the Settings Section:
|
|
|
|
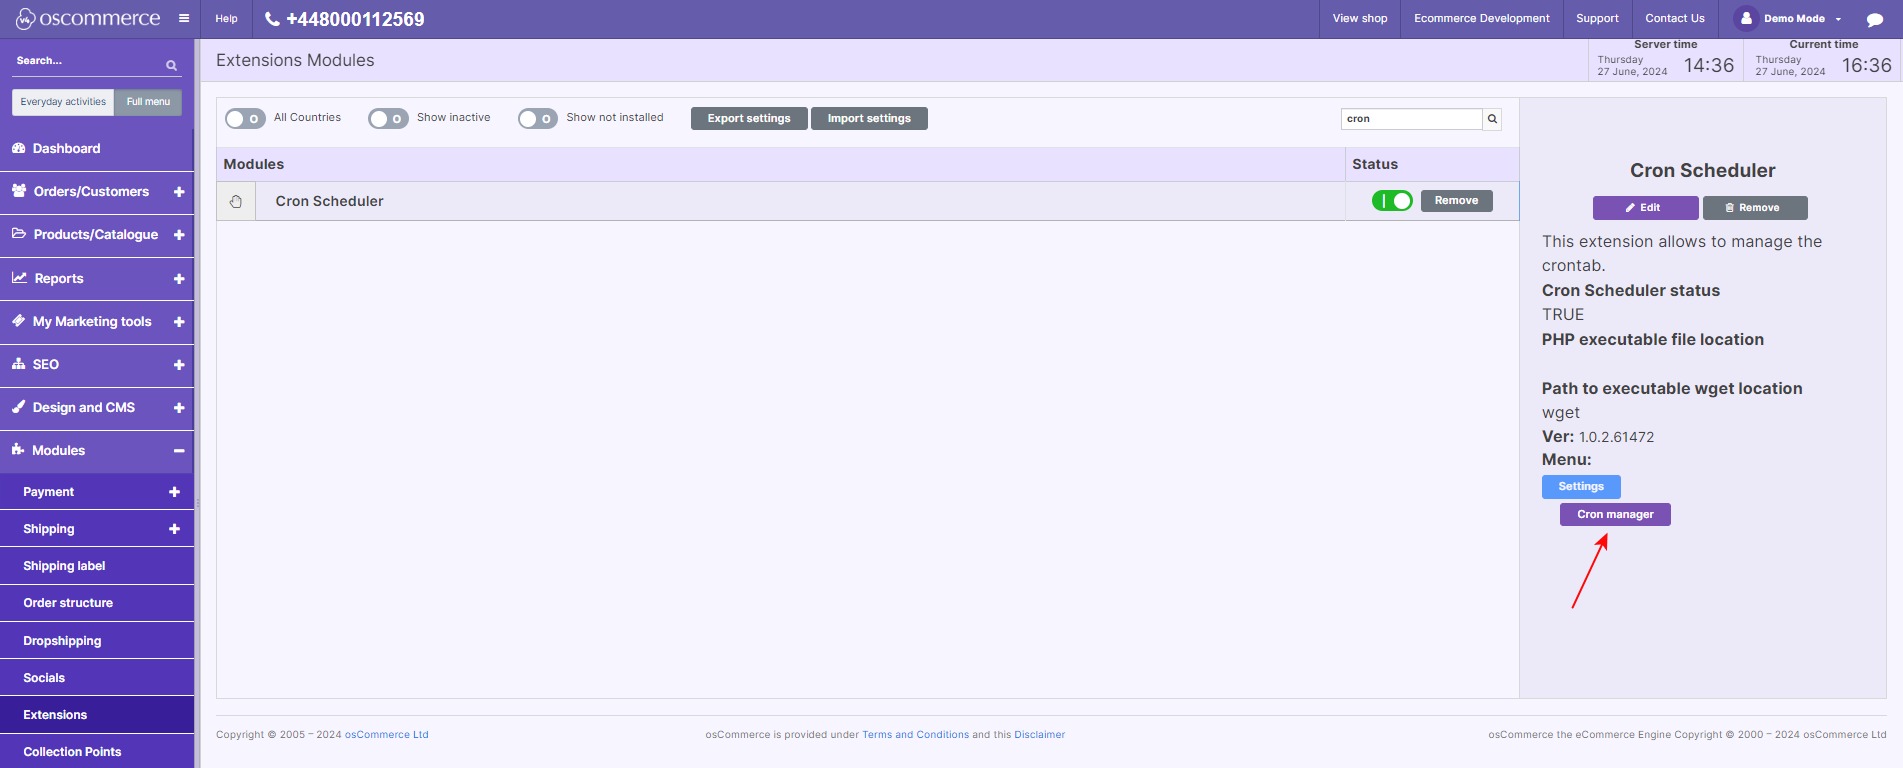
Managing Cron Jobs Once the module is configured, you can manage cron tasks through the Cron Manager. Accessing Cron Manager:
|
|
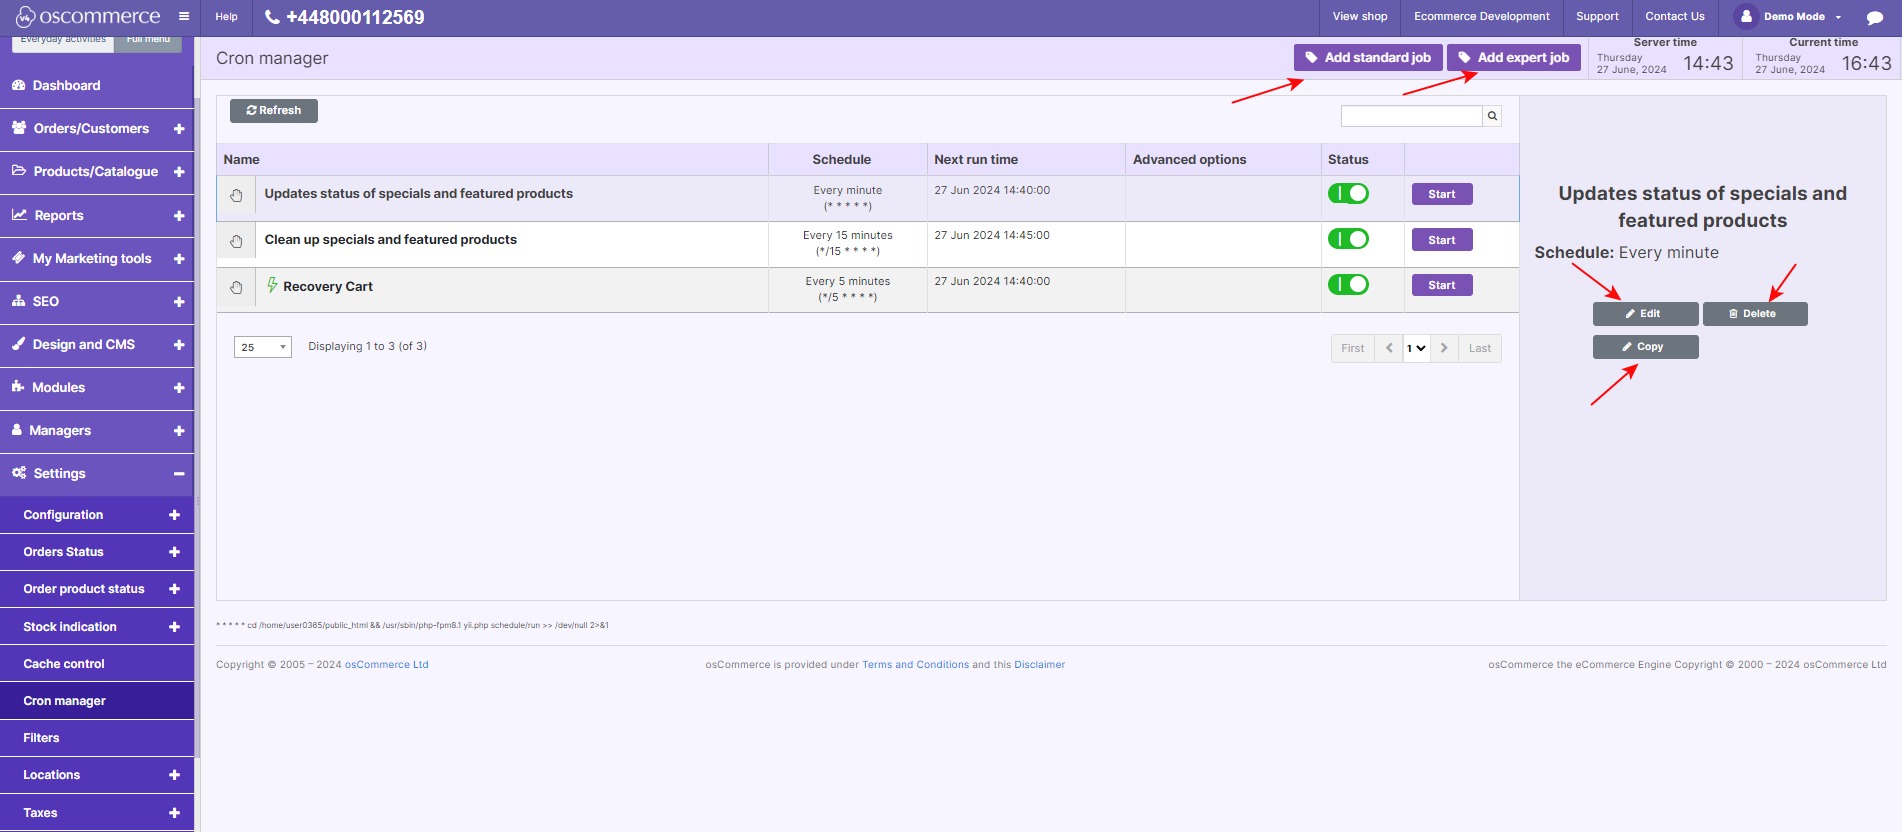
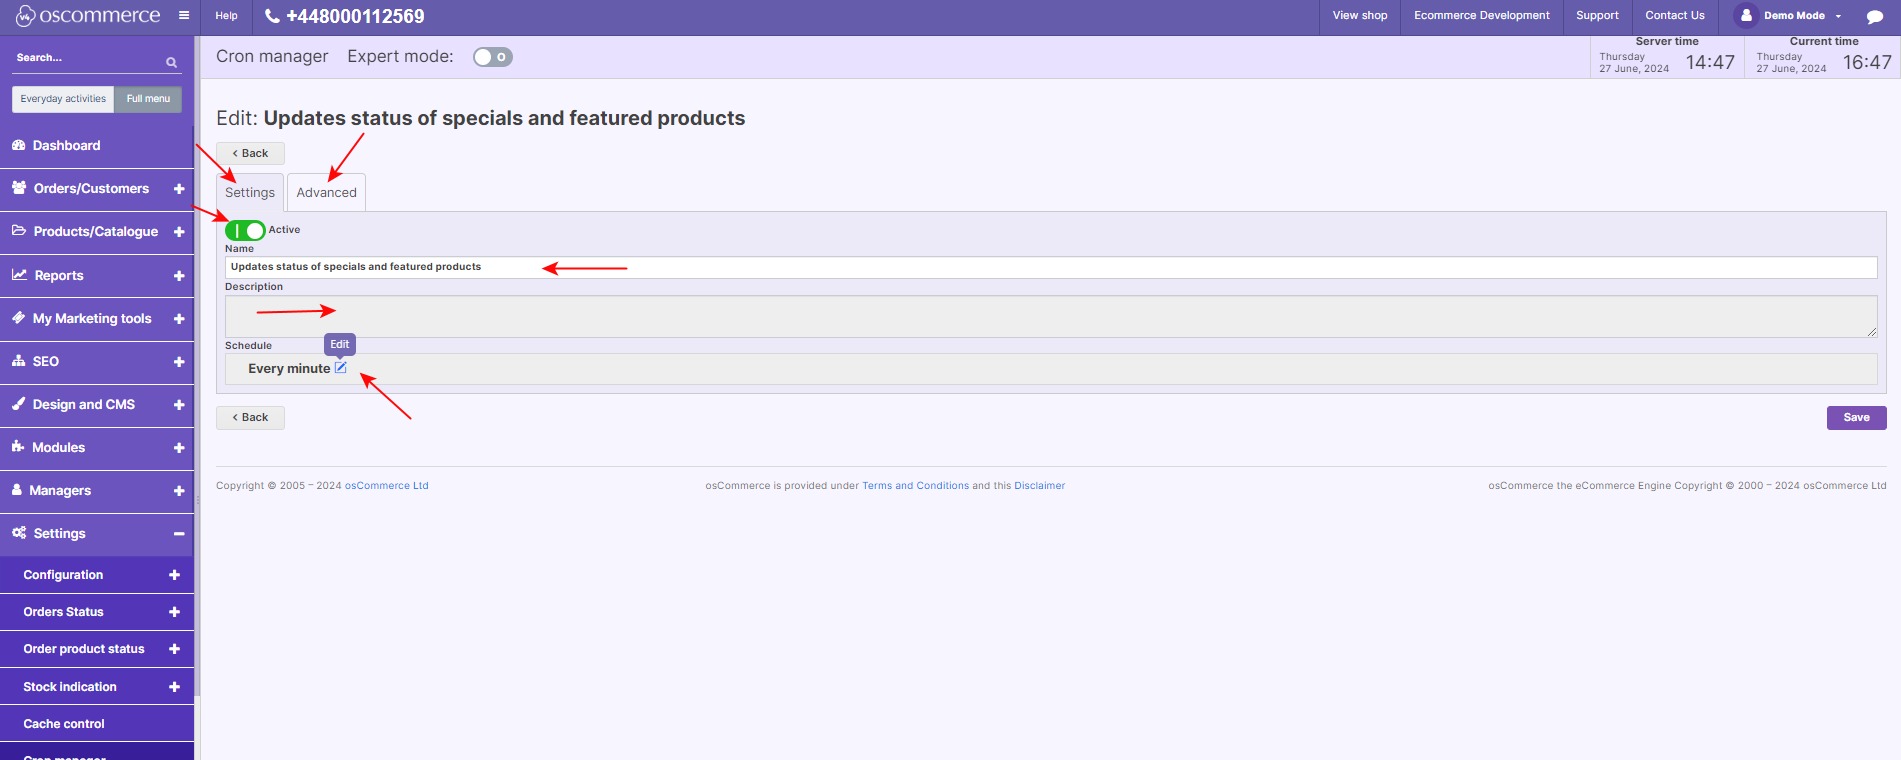
2. On the Cron Manager page, you can add, edit, copy, or delete cron tasks as needed. |
|
|
|
Adding or Editing a Cron Task:
|
|
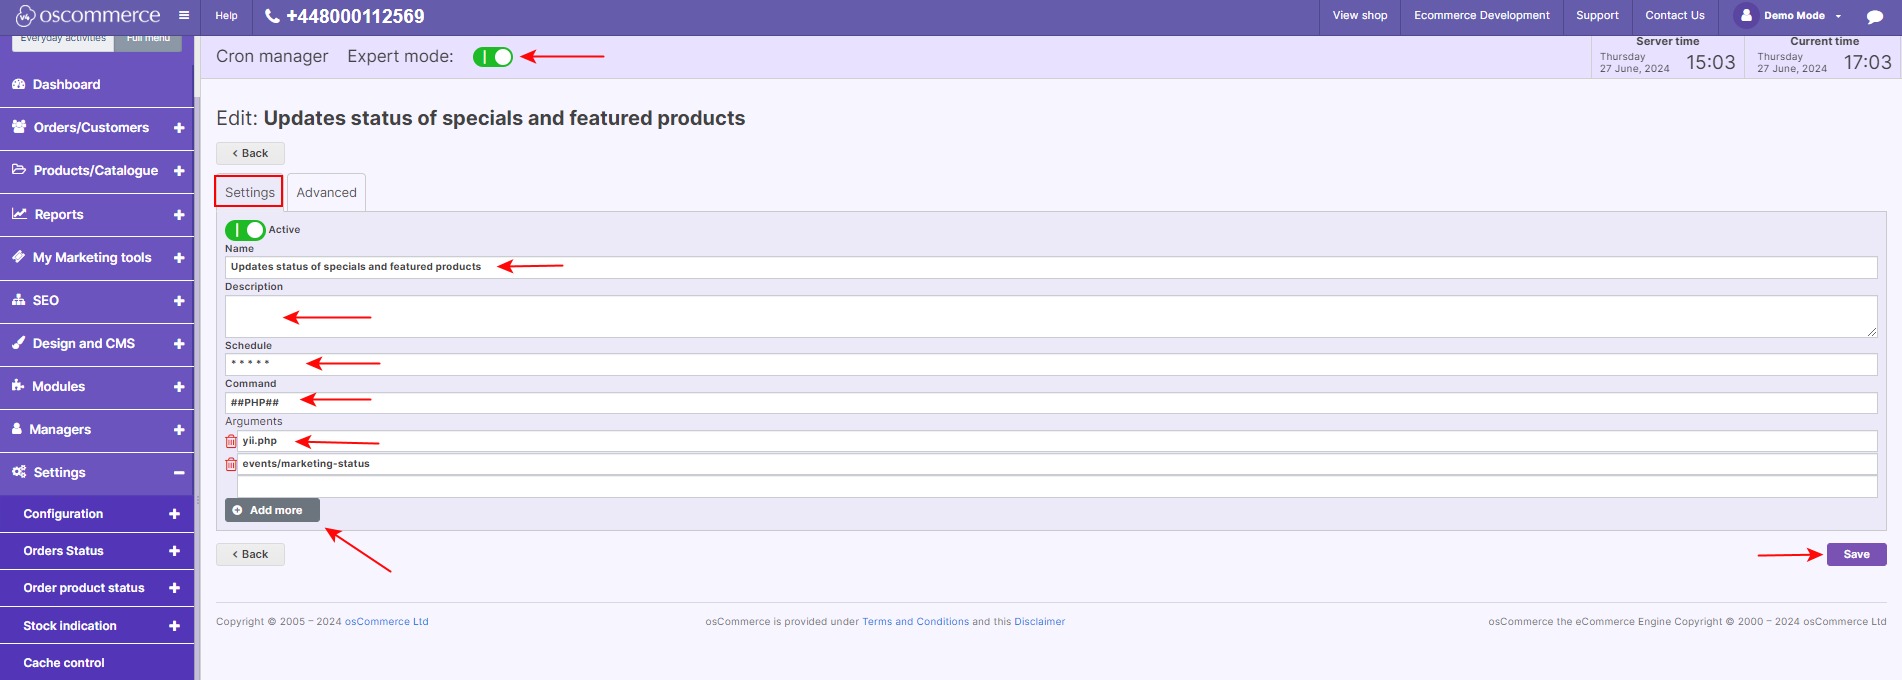
Expert Mode (Optional):
|
|
 |
Advanced Settings:
|
By following these steps, you can effectively automate various processes on your website, ensuring smoother operations and improved efficiency. The Cron Scheduler module provides you with the flexibility to manage cron jobs according to your specific needs and preferences.
You can also visit the module page on our osCommerce Wiki: https://www.oscommerce.com/wiki/Managing_Cron_Scheduler


